

The decision to move your WordPress site isn’t usually made on a good day. It’s almost always born from frustration – slow speeds, mysterious crashes, or support tickets that go nowhere.
Knowing when to pull the trigger is the first real step. This guide breaks down the entire process, starting with the clear signals that it’s time for a new home for your website.
Table of Contents
Knowing When It’s Time for a New Host

Moving a website isn’t just a technical task; it’s a strategic business decision. While “my site feels slow” is a common complaint, the real triggers are tied directly to your bottom line. Think of an e-commerce store crashing during a Black Friday sale or a blog’s search rankings tanking because of a sluggish server.
Recognizing these signals early saves you from bleeding revenue, traffic, and customer trust. A migration is an investment in your site’s future.
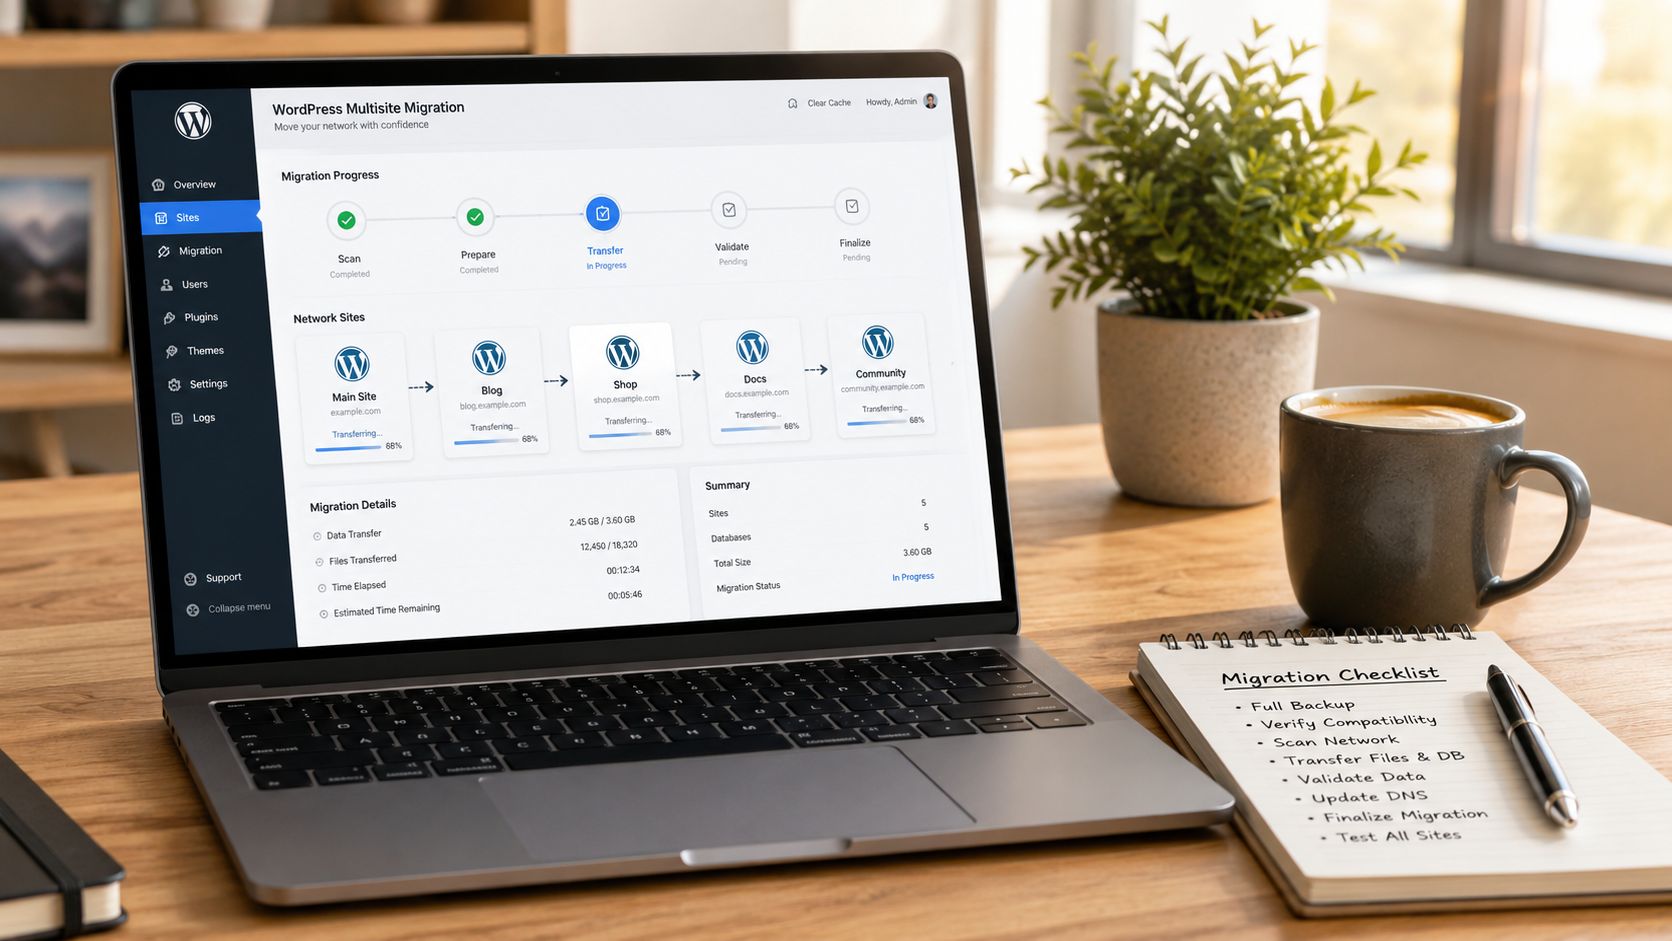
To help you decide, here’s a quick checklist that ties common symptoms to their business impact and urgency.
Migration Trigger Checklist
| Symptom | Business Impact | Migration Urgency |
|---|---|---|
| High TTFB / Slow Load Times | Poor user experience, higher bounce rates, lower conversions. | High |
| Frequent 5xx Server Errors | Site is unavailable, lost sales and leads, damaged brand trust. | Critical |
| Failing Core Web Vitals | Negative impact on SEO rankings and organic traffic. | High |
| Hitting CPU/Memory Limits | Site slows down or is suspended during traffic spikes. | High |
| Lack of Staging Environment | Pushing changes live is risky, leading to bugs or downtime. | Medium |
| Outdated PHP / No SSH Access | Security vulnerabilities and blocked developer workflows. | Medium |
If you’re nodding along to several items in the “High” or “Critical” columns, it’s definitely time to start planning your move.
Performance and User Experience Issues
Poor performance is the most obvious sign. If your pages crawl, especially on mobile, you’re actively losing visitors and sales. Slow server response times directly gut your Core Web Vitals, which are non-negotiable for modern SEO.
A few performance metrics scream “it’s the host”:
High Time to First Byte (TTFB): This measures server responsiveness. A consistently high TTFB—over 500ms—is a direct indictment of your hosting infrastructure.
Frequent 5xx Server Errors: If you see “503 Service Unavailable” or “500 Internal Server Error” during traffic spikes, your plan can’t handle the load. Period.
Failing Core Web Vitals: A slow backend is often the root cause of a poor Largest Contentful Paint (LCP) score. A faster host is the most direct fix. We have a full guide on how to improve Core Web Vitals you can dive into.
Reaching Your Hosting Plan’s Limits
Sometimes, you just outgrow your first apartment. Shared hosting plans are a fantastic starting point, but they have hard limits. Hitting those resource ceilings is a clear signal to pack your bags.
This often shows up as warning emails from your host about exceeding CPU or memory limits. This means your site is demanding more power than your plan provides, causing slowdowns or even temporary account suspension.
The WordPress ecosystem is remarkably stable, with a near-zero net migration rate; roughly the same number of sites move to WordPress as leave it. However, this balance hides a constant churn of users switching hosts for better performance, security, and scalability.
This constant movement proves that even loyal WordPress users frequently migrate a WordPress website to a new host to keep up with their ambitions. For a growing business, a hosting move isn’t an inconvenience—it’s a critical growth lever.
Security and Functionality Gaps
Security is another huge driver. If you’re on a shared server with other potentially unsecured sites, your risk profile is higher than it needs to be. A quality host offers better isolation, dedicated firewalls, and proactive security scanning.
Beyond security, your current host might simply be holding you back with a lack of modern features, such as:
A proper staging environment for safely testing updates.
Access to the latest PHP versions, which are vital for performance and security.
SSH access for developer workflows or automated deployments.
If the idea of a DIY migration sounds like a headache, a professional WordPress migration service can handle the entire process for you, ensuring a smooth and stress-free transition.
Your Pre-Migration Backup and Audit Plan
I’ve seen dozens of migrations go sideways, and almost every single one failed right here, at the beginning. A smooth move is all about solid preparation. Rushing this stage is the single biggest cause of post-launch chaos—think missing images, broken forms, and panicked phone calls.
Before you even think about moving a file, you need a complete inventory of what you’re working with. This “migration manifest” is your primary defense against ugly surprises. It ensures every critical piece of your site is accounted for, tracked, and ready for the move.
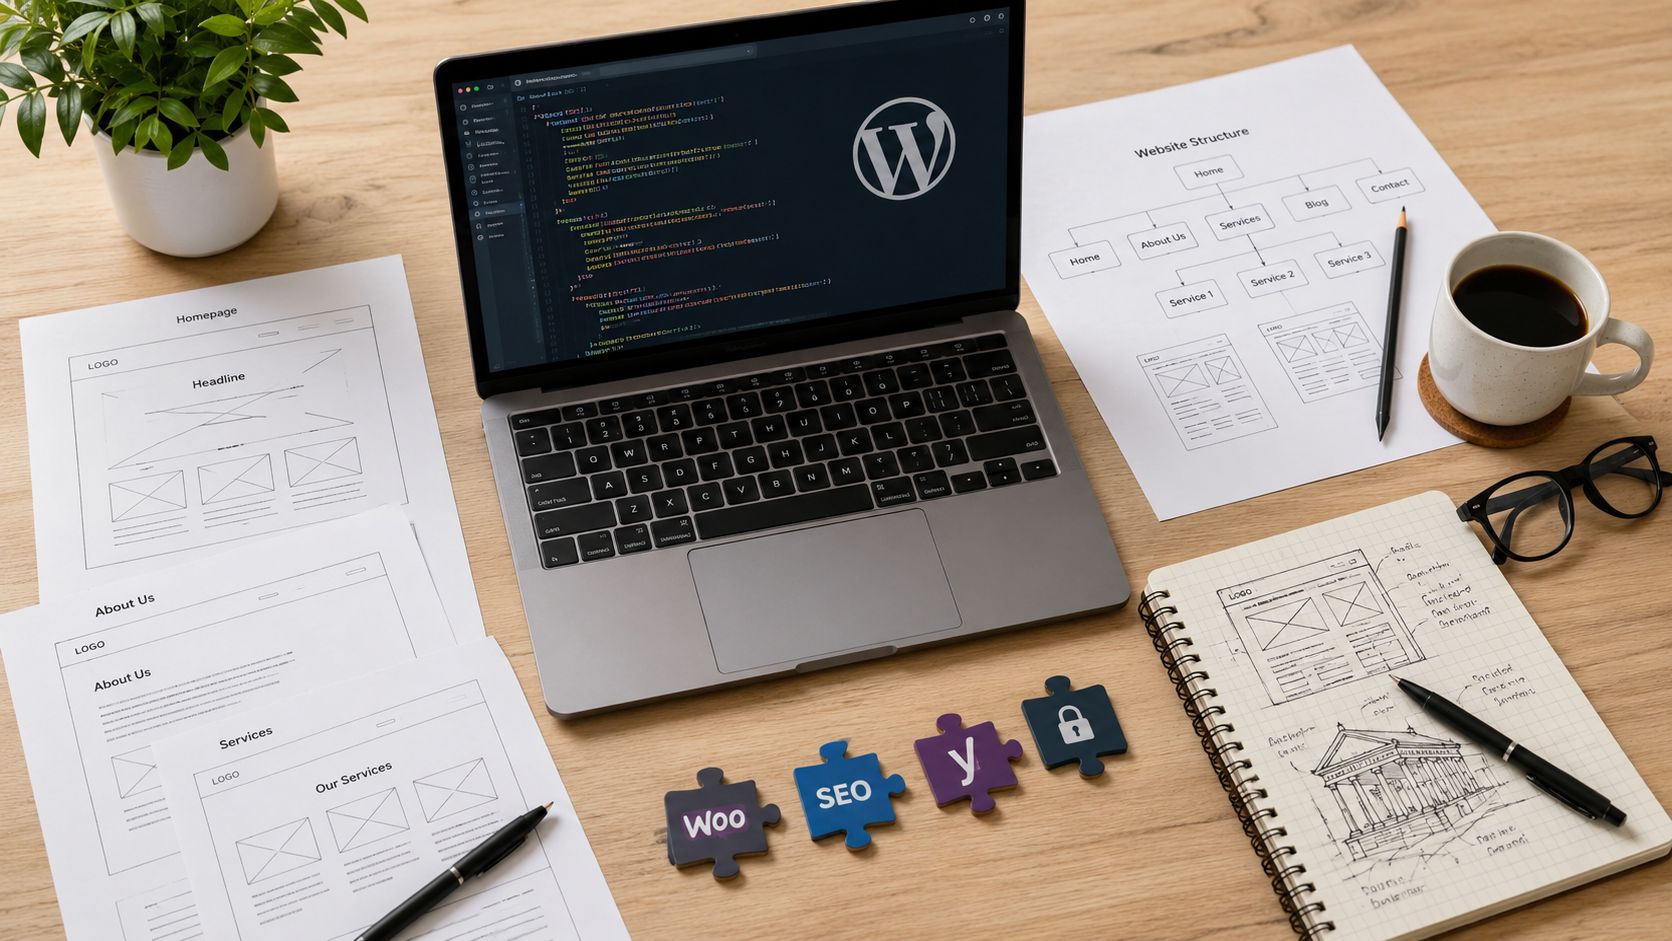
Building Your Migration Manifest
First things first: you need a comprehensive audit of your entire WordPress setup. This isn’t just a list of pages. It’s a functional catalog of everything that makes your site tick. The goal is to document every plugin, theme file, and external connection.
Your audit checklist should look something like this:
Active Plugins: List every plugin by name, version, and purpose. I always note which ones are premium—you’ll need to reactivate those license keys on the new server.
Theme Details: Are you running a commercial theme? A child theme? A full custom build? Document this, paying close attention to any custom code snippets you’ve dropped into
functions.php.Third-Party Integrations: Map out every external service connected to your site. This means payment gateways like Stripe, CRMs like HubSpot, and any marketing or analytics platforms you’re using.
Custom Code and Scripts: Don’t forget to account for custom JavaScript in your headers or footers, and especially any unique configurations in your
.htaccessfile.
This manifest becomes your best friend during validation on the new server. It turns a vague “check if everything works” into a systematic, trackable process you can actually complete.
Choosing Your Backup Strategy
With your audit done, it’s time for the most critical step: creating a full, verified backup. A backup is your safety net. Without a good one, you’re just gambling. You really have two main paths here: doing it manually or using a plugin.
A manual backup gives you absolute control, and I recommend every developer know how to do it. It’s a two-part process:
File Backup: Use an SFTP client like FileZilla or Cyberduck to connect to your current host. Download your entire WordPress directory. The
wp-contentfolder is the prize here, holding your themes, plugins, and media uploads.Database Backup: Log in to your host’s cPanel, open up
phpMyAdmin, and select your WordPress database. Head to the “Export” tab and download the database as a.sqlfile.
Together, these two components represent every piece of your website. Of course, migration plugins like UpdraftPlus or Duplicator Pro can make this easier by bundling everything into a single archive. They’re convenient, but understanding the manual steps is still a vital skill.
The rookie mistake is assuming a backup is good just because it downloaded. Always, always verify it. Open the
.zipto see your folders. Glance at the.sqlfile to make sure it isn’t empty or corrupted. Finding out your backup failed mid-migration is a complete nightmare.
The Importance of a Content Freeze
For any active site—especially a WooCommerce store or a busy blog—a “content freeze” is non-negotiable. This means you have to temporarily stop all changes to the site’s content and database. No new posts, no new user registrations, and absolutely no new orders.
The freeze prevents a customer from placing an order on the old site while you’re migrating the database, causing that order to vanish into thin air. If you need to, announce a brief maintenance window to your users. A little downtime is infinitely better than losing mission-critical data. This kind of careful planning is vital in an ecosystem where WordPress powers over 43.4% of the web, and businesses are constantly switching hosts for a competitive edge. You can find more insights on the fast-growing WordPress world and its migration trends.
Executing the Migration File and Database Transfer
Alright, this is where your careful prep work pays off and the real technical work begins. With a full backup ready and a content freeze active, it’s time to actually migrate your WordPress website to a new host.
We’ll cover two main paths: the hands-on manual process and the quicker, automated plugin route. I’m a big believer in learning the manual method first. It gives you total control and a much deeper feel for how all the pieces of a WordPress site actually fit together.
Before we start moving files, remember that a solid migration is built on a solid foundation. You should have already handled these three non-negotiable prep steps.
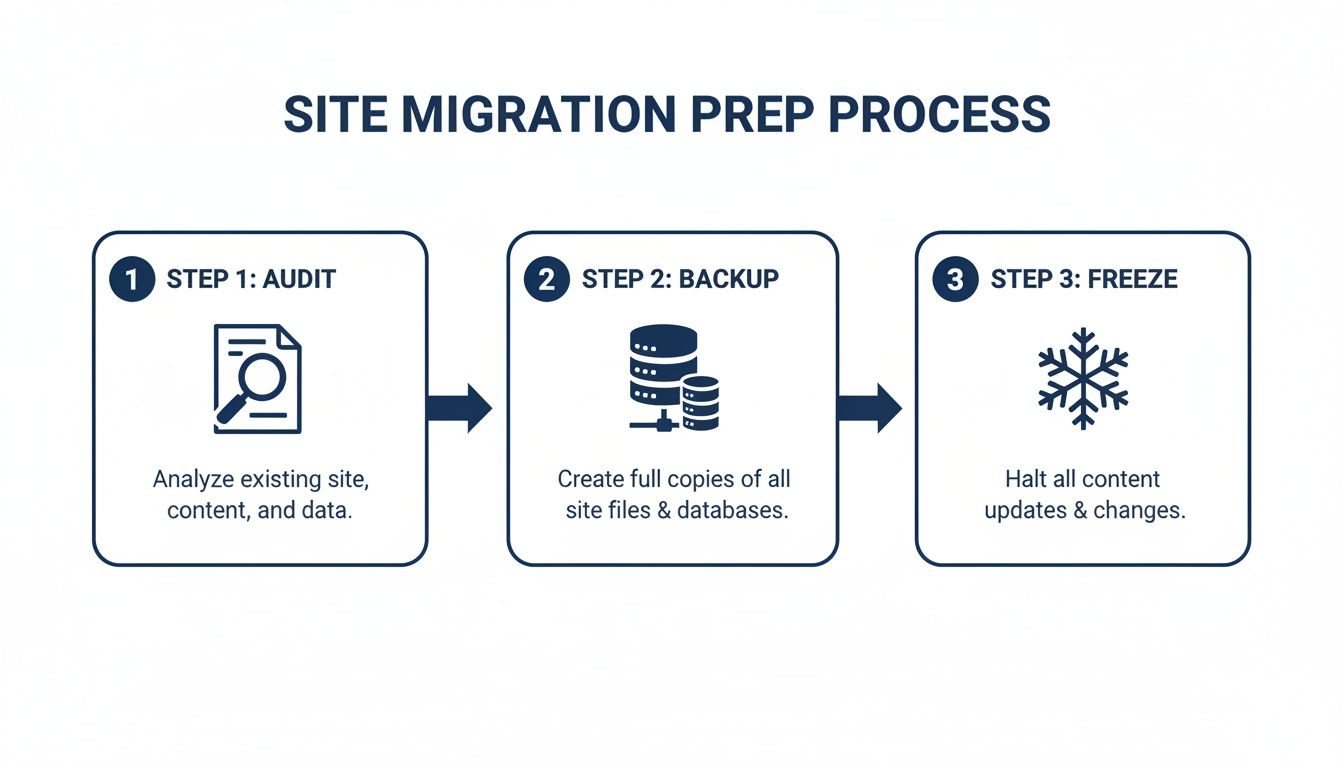
Think of this as your safety net. An audit, a complete backup, and a content freeze ensure nothing gets lost or broken along the way.
Manually Moving Your Website Files
First up, we need to get your website’s files from your computer to the new server. The best tool for this job is an SFTP (Secure File Transfer Protocol) client like FileZilla or Cyberduck.
Use the SFTP credentials provided by your new host to log in.
Once connected, find the public root directory. This is usually named
public_html,www, or sometimeshtdocs.On your computer, navigate to the unzipped folder containing your WordPress files.
Drag the entire contents of that folder over to the SFTP client window and drop them into the
public_htmldirectory.
This part can take a while, especially if you have a large wp-content/uploads folder full of images and media. Seriously, now’s a great time to go grab a coffee while the progress bar inches forward.
Handling the Database Migration
While your files are uploading, you can get started on the database. This is where all your content lives—posts, pages, user accounts, and all those plugin settings.
Your first move is to create a fresh, empty database on the new hosting account. Jump into your host’s control panel (like cPanel or Plesk) and look for a tool named “MySQL Databases” or “Database Wizard.”
Follow the prompts to create a new database. You’ll also need to create a new database user and give that user full permissions to the database you just made.
Write down the database name, username, and password. You are absolutely going to need these in a few minutes. A typo here is one of the most common reasons for a migration to fail.
With the empty database ready, it’s time to import your backup:
Open phpMyAdmin on your new hosting account.
From the list on the left, select the empty database you just created.
Click on the “Import” tab at the top.
Choose the
.sqlbackup file from your old site and kick off the import.
Updating Your Configuration File
Your files and database are now on the new server, but WordPress doesn’t know how to connect them. We need to tell it where to find the new database. This crucial link is defined in one of the most important files in your entire installation: wp-config.php.
Find the wp-config.php file in the root directory you just uploaded. Open it in a text editor and find these specific lines of code:
define( 'DB_NAME', 'old_database_name' );
define( 'DB_USER', 'old_database_user' );
define( 'DB_PASSWORD', 'old_database_password' );
define( 'DB_HOST', 'localhost' );
Carefully replace the old placeholder values with the new database name, username, and password you wrote down earlier. DB_HOST is usually localhost, but some hosts require a specific server address, so double-check their documentation. A single mistyped character here will bring your site down with a database error. If you get stuck, our guide on how to fix an “error establishing a database connection” has you covered.
Tackling URL Updates and Plugin Alternatives
You’re almost there, but one critical cleanup task remains. Your database is still filled with hard-coded URLs pointing to your old domain, which will result in tons of broken links and missing images. You have to run a “search and replace” on the database to fix them.
My go-to tool for this is the Better Search Replace plugin. Install it on the newly migrated site, and you can quickly run a search for https://olddomain.com and replace it with https://newdomain.com. Always do a “dry run” first—it shows you what will be changed without actually making any modifications.
Of course, the manual approach isn’t for everyone. Plugins like Duplicator or All-in-One WP Migration can automate this entire process. They bundle your site into a neat package and handle the file transfer, database import, and URL updates for you.
| Aspect | Manual Migration | Plugin Migration |
|---|---|---|
| Control | Full control over every step and file. | Less direct control; you trust the plugin’s process. |
| Learning | Excellent way to understand WordPress internals. | Quick and convenient, but hides the underlying process. |
| Reliability | Depends on your precision. | Very reliable for standard sites, but can fail on large or complex setups. |
| Cost | Free (requires your time). | Often requires a paid version for larger sites. |
For smaller, straightforward websites, a plugin is a perfectly good choice. But for large or complex sites—or for when a plugin migration unexpectedly fails—knowing the manual method is an invaluable skill to have in your back pocket.
Validating the Site and Final Go-Live Strategy
Getting your files and database onto the new server is a huge milestone, but don’t pop the champagne just yet. This next phase—quality control—is what separates a smooth launch from a post-migration disaster. Rushing now is how you end up with broken forms, missing images, and a terrible first impression on your new hosting.
The goal is simple: before a single real user sees the new site, you need to test everything in a private staging environment. This is how you migrate your WordPress website to a new host without any public-facing errors.
Previewing Your Site on the New Host
Most solid hosting providers give you a temporary URL to preview your site before the DNS is updated. It usually looks something like http://123.45.67.89/~youruser and it’s the fastest way to get your eyes on the migrated site.
For a more true-to-life test, you can edit your local hosts file. This little trick makes your own computer load the site from the new server’s IP address while the rest of the world still sees the old site. It’s the best way to see exactly how your site will perform after the final switch, including SSL certificate behavior.
The Essential Post-Migration QA Checklist
With access to the preview, it’s time to go through the site with a fine-toothed comb. Don’t just click a few links – be methodical. You’re hunting for any issues caused by the new environment before your customers find them.
The best way to do this is with a structured testing plan. To make sure nothing is missed, it’s wise to build out effective user acceptance test plans that cover every critical user journey on your WordPress site.
Your QA checklist should cover, at a minimum:
Front-End Visuals: Check key page templates—homepage, about page, blog posts, contact—for any layout bugs, broken images, or font rendering problems.
Core Functionality: Test every single form. Submit your contact form, sign up for your newsletter, and test any quote request forms to confirm the notifications actually arrive.
User Accounts and Logins: If you run a membership or e-commerce site, log in as a test customer. Run through the password reset flow to ensure it works correctly.
E-commerce Workflow: For WooCommerce sites, this is non-negotiable. Place a test order, from adding a product to the cart all the way to the final confirmation page.
Permalinks and Links: Click through your main navigation, footer links, and any in-content links to ensure they work and don’t throw 404 errors.
Here’s a pro tip that solves a surprising number of post-migration headaches: log in to your new WordPress admin, go to Settings > Permalinks, and just click “Save Changes.” This one click flushes the rewrite rules on the new server and can instantly fix a whole host of 404 errors.
The Go-Live Moment: Updating Your DNS
Once you’ve tested everything and you’re confident the site is running perfectly on the new server, it’s time to make it official. The final step is updating your domain’s DNS records to point to your new host.
Log in to your domain registrar (the service where you bought your domain, like GoDaddy or Namecheap). You’re looking for the DNS management section to edit the A record. You’ll need to update the IP address for your root domain (often shown as an @ symbol) and your www subdomain to the new IP address from your host.
Pay attention to the TTL (Time To Live) setting. A low TTL (like 300 seconds) helps the change spread faster. DNS propagation can take anywhere from a few minutes to 24-48 hours to fully complete worldwide, so a little patience is required.
For a comprehensive pre-launch list, our guide with a go-live checklist for a WordPress website launch has you covered.
Handling Advanced and Complex Migrations
Migrating a standard WordPress blog is one thing. But what happens when you need to migrate a WordPress website to a new host and it’s a Multisite network, a high-traffic WooCommerce store, or a modern headless setup?
That’s a completely different ballgame. These advanced migrations demand serious planning and a steady hand. One small mistake can take down an entire network of sites, lose customer orders, or break your front-end application. Let’s walk through the playbook for handling these complex moves without a hitch.
Tackling a WordPress Multisite Migration
A WordPress Multisite network is a beast of its own. It lets you manage dozens or even hundreds of sites from one WordPress install, but this convenience comes at a cost: database complexity. All site data is woven together in the same tables, identified only by a blog_id.
When you’re moving a Multisite, your focus has to be razor-sharp.
Database Integrity is Everything: Pay special attention to the
wp_blogs,wp_site,wp_sitemeta,wp_users, andwp_usermetatables. They are the network’s central nervous system. A standard search-and-replace can be catastrophic here; a badly written query will corrupt the entire network in an instant.Domain Mapping: If you’re using domain mapping to give each site its own unique domain, that entire configuration needs to be perfectly replicated on the new server. This touches both the database and often server-level configs.
File Structure: The
wp-content/uploads/sites/directory is mission-critical. It contains all media for every sub-site, neatly organized by site ID. This directory tree must be moved perfectly intact.
I once handled a Multisite migration for a franchise with over 50 regional sites. A generic search-and-replace plugin completely butchered the serialized data arrays storing network-wide plugin settings. We had to roll back from a backup and bring in a Multisite-aware tool like the Better Search Replace plugin, which has dedicated support for Multisite tables, to finally get it right.
Moving a WooCommerce Store with Zero Lost Orders
For any active WooCommerce store, downtime equals lost money. The absolute top priority is ensuring you don’t lose a single order during the migration.
The gold standard for a WooCommerce migration involves putting the old site into a brief, controlled maintenance mode for the final data sync. This prevents any “last-minute” orders from being placed on the old server while you’re making the final switch.
Here’s a proven strategy for a near-zero-downtime move:
First, perform a full migration of the site to the new host, treating it as a staging environment.
Test everything on this staging copy: products, the shopping cart, checkout flows, payment gateways, and customer accounts. Be ruthless.
Once you’re confident, put the live site (the old one) into maintenance mode.
Immediately perform one last, targeted data sync. Export only the new orders and customers from the old site and import them into the new one.
With the data synced, update your DNS to point to the new server’s IP.
Take the new site out of maintenance mode. You’re live.
This method shrinks the “content freeze” window from potentially hours down to just a few minutes, giving you a seamless transition without sacrificing any sales data.
Migrating Headless and Multilingual Setups
Headless WordPress migrations present a unique challenge. Since your back end is decoupled from your front-end application (often built with React or Vue.js), the migration is less about themes and more about APIs and environment configs.
Your checklist should focus on:
API Endpoints: Your front end talks to WordPress through its APIs (like the REST API or GraphQL). You have to ensure these endpoints are live and accessible on the new host. Double-check any security rules or CORS policies.
Environment Variables: Your front-end app almost certainly uses environment variables to define the URL of its WordPress back end. This value must be updated to the new server’s address after the move.
Multilingual sites, typically managed with plugins like WPML or Polylang, add another layer of complexity. These tools create intricate database relationships to connect translated posts, pages, and products. A blind search-and-replace will almost certainly sever these connections. I strongly recommend using the built-in migration tools provided by these plugins or a migration plugin that explicitly states it supports their data structures.
Finally, don’t forget about performance. Once your advanced site is on its powerful new host, take advantage of it. Look into server-level caching tools like Redis or Varnish. Setting up an object cache with Redis, for instance, can slash the database query load—a common bottleneck for large Multisite and WooCommerce installations. This last step ensures you’re not just moving your site, but truly unlocking its next level of performance.
Common WordPress Migration Questions Answered
Even the most buttoned-up migration plan comes with questions. When you’re about to move your WordPress site to a new host, it’s natural to have a few “what ifs” pop into your head.
Getting straight answers to these common worries is the difference between a stressful project and a confident one. Let’s run through the questions we hear most often from clients and developers before they flip the switch.
How Long Does a Migration Really Take?
This is always the first question, and the honest answer is: it depends. A small blog with a handful of media files might only take an hour of your active time. A massive e-commerce store with a multi-gigabyte database, on the other hand, could easily take several hours or even a full day.
The timeline really boils down to three things:
Total Site Size: This is the combined size of your file system (your
wp-contentfolder) and the exported.sqldatabase file.Migration Method: Manually uploading files via SFTP can be painfully slow, depending on your connection. Some migration plugins are faster, but only if they don’t time out on a large site.
Your Experience: If you’ve done this a dozen times, you’ll fly through it. If this is your first migration, plan for extra time to double-check every step.
And don’t forget DNS propagation. After you point your domain to the new server, it can take anywhere from a few minutes to 48 hours for that change to be seen everywhere. This isn’t work time, but it is part of the total transition period.
Will Migrating My Site Hurt My SEO?
This is a huge, and completely valid, concern. A botched migration can absolutely tank your search rankings. The main killers are long periods of downtime and a flood of broken links (404 errors)—both are massive red flags for search engines.
But when you do it right, moving to a better host should actually improve your SEO. A faster server is a direct boost to your Core Web Vitals, which is a known ranking factor. By ensuring zero downtime, running a meticulous search-and-replace on all your URLs, and landing on a high-performance server, you’re giving Google all the right signals.
A great migration isn’t just about dodging SEO penalties; it’s about setting the stage for SEO growth. Better speed and reliability are long-term wins for your rankings and user experience.
As a final check, running a site audit with a tool like Ahrefs or Semrush post-migration is always a smart move.
Is a Zero-Downtime Migration Possible?
Yes, and for most sites, it’s the standard professional approach. It’s not magic—it’s just a solid process. You set up the entire site on the new host using a temporary URL or by editing your local hosts file to preview it. The old site stays live the whole time.
Once you’ve tested everything and confirmed the new site is a perfect, working copy, the final step is a simple DNS update. You just change the A record for your domain to point to the new server’s IP. For a short time, some visitors will hit the old server and some will hit the new one. Since both are identical and live, no one ever sees a broken site.
For very active WooCommerce stores, we recommend putting the site into maintenance mode for just a few minutes right before the final DNS switch. This allows for one last data sync to make sure no orders are lost in the transition.
What Are the Most Common Mistakes?
Having overseen hundreds of migrations, I see the same avoidable mistakes trip people up time and time again. If you can steer clear of these, you’ll save yourself a world of pain.
Here are the top pitfalls to watch out for:
Not verifying your backup: Don’t just download it. Unzip the file and look at the
.sqlto make sure it’s not empty or corrupted.Forgetting to update
wp-config.php: A single typo in the new database credentials is the number one reason you’ll see an “Error Establishing a Database Connection.”Skipping the URL search-and-replace: This is a classic. You end up with broken images and internal links all over the live site.
Ignoring file permissions: Incorrect permissions on the new server can break site functionality or, even worse, create security holes.
Forgetting to resave permalinks: This is a simple one. Just go to Settings > Permalinks in your new admin dashboard and click “Save” to flush and rebuild the rules on the new server.
Navigating a WordPress migration requires careful planning and a steady hand. At IMADO, our senior engineers specialize in seamless, zero-downtime migrations for ambitious brands, from complex WooCommerce stores to enterprise-level Multisite networks. If you need a partner to ensure your move is fast, secure, and flawless, explore our WordPress development services.